Pages

Thursday, May 31, 2012

81 Days of Summer Vacation - The List

As I was talking with a friend that works full time I realized that I am really fortunate to be able to stay home with Julia while I go to school.  I often find myself consumed by the "things" that need to be done and put off spending time actually playing.  I decided that is going to change!  I only have 18 months left in school before I will be back working full-time.  I want to make sure that I make the best of that time with Julia and learn to let the "things" wait.  
While watching Phineas and Ferb, the theme song gave me a great idea!  I have 81 days that I will be home with Julia between now and Labor Day.  I have made a list of 81 things for us to do together.  We will pick one thing from the list to do each day.  Some things are going out and about, some are nice rainy day activities, and others are just fun things to do at home together.  The point is, 


I will make the best of our time together!

Here is our list of activities.  They are in no particular order, so we can do what looks like fun each day!
1. Millennium Park Beach
2. John Ball Zoo
3. Fishing
4. Blow Bubbles
5. Make Lemonade
6. Finger Paints
7. Water Fight
8. Make Popsicles
9. Swim
10. Drive-in Movies
11. Splash Pad
12. Cook out
13. Hike
14. Visit a Farm
15. Sidewalk Chalk
16. Picnic
17. Fireworks
18. Parade
19. Library
20. Feed the Ducks
21. Pillow Fort
22. Make Applesauce
23. Build a Sandcastle
24. Visit the Residents as Busia's work
25. Handprint Art
26. Visit the Firestation
27. Sleep in a Tent
28. Road Trip
29. Sponge Balls
30. Paint Rocks
31. Paint Coffee Mugs
32. Public Museum
33. Children's Museum
34. Pudding Finger Paint
35. Peanut Butter Playdoh
36. Ice Cube Painting
37. Eat Watermelon
38. Craft Day
39. Catch Fireflies
40. Pick berries
41. Visit a Dairy Farm
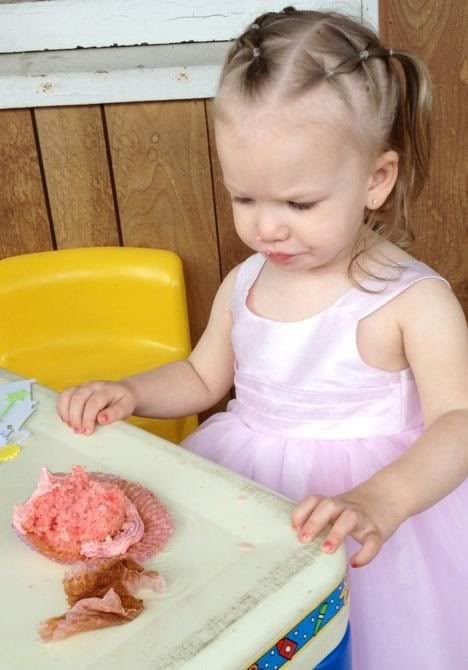
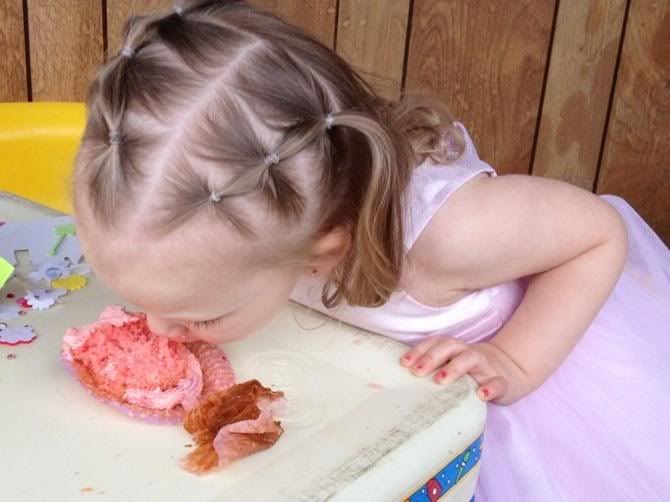
42. Make and Decorate Cupcakes
43. Story time at Barnes and Noble
44. Discover a New Playground
45. Visit a Nature Center
46. Make Rootbeer Floats
47. Eat Dinner Outside
48. Picnic at the Beach
49. Visit the Airport
50. Mail a Letter
51. Children's Garden
52. Stanwood
53. Ice Cream
54. Boulder Ridge Animal Park
55. Binder Park Zoo
56. Farmer's Market
57. Visit Tunnel Park
58. Ride the Trolley
59. Musical Fountain
60. Go to GR Festival of the Arts
61. Book Fest
62. Blues on the Mall
63. Polish Festival
64. Run Through the Sprinkler
65. Hot Dog Restaurant
66. 4H Fair
67. Bring Ice Cream to a Friend
68. McDonald's Playplace
69. Rice Table
70. Sandbox
71. Little Pool
72. Take Babies for a Walk
73. Make Our Own Bubbles
74. Grand Haven Beach
75. Garage Sale-ing
76. Make Necklaces with Pasta
77. Play Paperdolls
78. Paint With Water
79. Do Puzzles
80. Stickers
81. Open Gym at Radiant 


The fun begins tomorrow!

It's that time again!  Join me at Scrapfreak.com for the Summer Points Challenge!


The points challenge is simple. Everything you create between June 1, 2012 and July 31, 2012 will earn you points. Every patterned paper, photo, rub-on, washi tape, brad, etc. will earn you points. The goal is to get stuff done. The more you scrap, the more points you earn. 

This year, you'll have two choices on how to play…you can play along just for the fun of it ORyou can play along for prizes. To play for prizes, you need to send me $8 via USPS by June 10th. All prize money will be used to award and ship prizes at the end of the challenge. 


The prize categories will be:
Most Points Overall 
Whether you scrap 10 layouts or 100, the person with the most overall points wins.

Most Layouts CompletedDon’t use a lot of embellishments? No problem. The person with the most layouts completed wins.

Random Drawing(s)Random drawing(s) of everyone that participated in the prize portion of the challenge. 

The exact number of random drawings and amounts won for each category will depend on the total prize money collected. You may only win one category. In the event one person would have both the most points and the most layouts, one of the prizes would be given to the runner up. 


Get your friends to play and pay for more points:
The more people that play the better the prizes so we’re going to give you 25 extra points right off the bat if you convince someone* to play and pay! Know a freak that hasn’t participated on the site in 2012, get them back here (they have to say you convinced them) or get a friend to join for the first time. Both you and the friend will earn the points if you both play and pay. 

*Applies to anyone that hasn’t participated on the site since January 1, 2012.

Details, details:
- Points will only be awareded for new layouts created between June 1, 2012 and July 31, 2012. 
- All players must keep track and log their own points in the points thread. Points thread will be created on June 1, 2012.
- All layouts must be uploaded to the Scrapfreak gallery and linked to the points thread with your point details. 


So, are you ready to get some scrapping done this summer?!

Monday, May 28, 2012

I Mustache U a Question: gel-a-tins DT layout

Casey sent me this picture one afternoon while Luke was at work with her.  I think it sums up his personality!  I loved using it to create this layout for gel-a-tin stamps!

Supplies:
Mustache Mania stamp set - gel-a-tin stamps
watermark ink - versamark
black ink - studio g
Twill tape - Stampin' Up
black alphas - American Crafts thickers
journaling spot and word banners - echo park This and That Charming line
U - pink paislee


I had fun with the Mustache Mania stamp set!  First, I stuck the mustache stamps all over my acrylic block to create a fun background stamp and used Versamark ink to create a tone on tone background paper.  I then stamped a mustache in black ink onto cardstock and cut it out.  To get a more worn out look with my image, I first stamped onto scrap paper, then onto the cardstock.  


I also used the stamps again to create a patterned ribbon.  I used repositionable adhesive and stuck the ribbon down to my work surface.  I then added my three favorite stamps to my block.  I then stamped the images repeatedly on the ribbon.  

One of my favorite things about gel-a-tins stamps is that I can add a bunch of the stamps onto the block so that I can stamp a few times and get multiple images.  It makes it so that I can get the effect I want without having to stamp each image individually.  It makes stamping a background paper a lot faster!


Friday, May 18, 2012

Mustache Monster- gel-a-tins stamps

Today is my first day being featured on the gel-a-tins blog!!!  I love the quality of the stamps!  


I saw this stamp set and knew I had to make a card to send to my friend! Who wouldn't enjoy a mustache card?!?

Image


Supplies Used:
gel-a-tins Mustache Mania stamp set, Studio G black ink, Maya Road Avocado Metallic Mist, Sassafras Lass monster paper and brads, Pink Paislee rub-on, My Little Shoebox letter stickers, American Crafts button, Twinery twine, and Becky Higgins grid journaling spot.

Instructions:
I wanted to use the mustache stamps as a background, so I made a background stamp out of them! I randomly placed the mustache stamps on my acrylic block. That way I could stamp several mustaches at one time. First I misted the white cardstock to give it some color and stamped over the misted area.

Image

Thursday, May 17, 2012

Scrapfreak's Wonderful Wednesday

The Wonderful Wednesday card challenge at Scrapfreak is to create a card that has key elements that are nature oriented. Think trees, wood grain, flowers, butterflies, animals.  I knew instantly that I wanted to use my new Love Knots stamp from gel-a-tins!


Friday, May 11, 2012

5.11 Freaky Friday-Mental Health

May is Mental Health Month, so in honor of this event, we are challenging you to creative a page about mental health or illness. It can be as simple as what you do to take care of yourself mentally, like ways you de-stress or help maintain balance. Or consider documenting something more serious like a mental health issue you or a loved one has dealt with. Sometimes its the tough pages that can be the most rewarding to create.


Here is my layout:


This was a great thing to scrap for me.  I have recently begun to see the signs of depression in myself.  One of the things about going to school for Social Work is that I often see the signs of mental illness in others, but I have been ignoring my own signs.  I have now set an appointment for myself!


Tuesday, May 1, 2012

Sniff, sniff. My baby is TWO!

I can't believe that Julia is already two!  It's bittersweet.  She is as independent as ever.  She is talking like crazy and repeating everything she hears.  I miss my sweet little snuggle bug, but I love watching her grow into a big girl that is full of personality!

We had her birthday party on her actual birthday this year.  I had so much fun getting ready for her "Princess Party"!!  Of course, I was having so much fun that I forgot to take pictures of everything.  Thank goodness I have a picture happy family, so they picked up my slack!

We turned the house into a pink and purple explosion of glitter and tulle!
I made tulle pom-pom decorations for the cake table.

Grandma bought Julia a beautiful pink princess dress to wear for her party.  She loved twirling the skirt around!

I decided that instead of games at the party, the kids could decorate crowns and wands!  I used the Cricut Princess Party event cartridge and cut out cute little crowns with a number two in the center.  Then the kids used foam stickers and jewels to decorate their own party crown.  I also used my Cricut to cut out stars for the top of the wand.  I ran the stars through my Xyron and then stuck two together with a dowel in the middle.  I added some curling ribbon on the stick and we had wands!

Julia thought that the stickers were really cool, but she just wanted to play with them.  She didn't want anything stuck on her crown or wand!


Here is Kadymn with her beautiful crown!


Grandma also made Julia pink strawberry cupcakes with pink buttercream frosting and purple sugar sprinkles.  And, since Julia is a goof ball, she decided to eat her cupcake without using her hands!


And she thought she was SOOO funny!


Everyone knew exactly what Julia loves!  She received tons of babies and baby accessories. 


And Uncle Jason knew exactly what kind of Barbie she wanted.  One without clothes of course!

And Uncle Mark and Grandpa sure know how to spoil a girl!  They bought Julia her very first car.  A Jeep Wrangler just like they both have!


We loved having everyone here to celebrate with us!  Even if it was cold outside so there were 50 people stuck inside.  Everyone had so much fun and Julia was so happy to have her family and friends here with her.  She told me all day long that she was happy!!!


Woohoo! My first gel-a-tins package!

After returning from a super fun, yet equally exhausting, trip to Chicago I found a package from gel-a-tins waiting for me!!!

I am so excited to start creating with the stamps I received.  Since I am so excited about them, I decided to give a sneak peek at what I will be working with this month.

First up, a sweet background stamp!  I love the look of woodgrain.  Combine that with sweet heart shapes and you get Love Knots!


Next is a really fun set!  Mustaches are so trendy and fun right now.  I have several ideas for silly gifts to make with this set.  Check out Mustache Mania


I will be uploading projects using these sets on the gel-a-tins blog, so make sure you check it out!

Sunday, April 15, 2012

Quick, Stress-free Glittering!

When I decided to glitter the letters on Julia's birthday I dreaded the wait for glue to dry!  Xyron to the rescue!!!  I instantly thought about using my Creative Station so that I can have a nice edge to edge coat of adhesive without having to wait on wet glue to dry before I continue on with my project or worrying about adding glue in small sections so that parts didn't dry before I added glitter to everything.  It made things go MUCH faster and took the stress out of adding glitter to 17 letters and crowns.

Want to try stress-free glittering?  Here is how I did it:

Run your pieces through your Creative Station. Remember to add adhesive to the TOP side, not the bottom like you would to stick the piece down on your project! (I admit, I ran the wrong side through twice!) Then peel the plastic sheet off and remove the piece to be glittered.


For crisp edges and to make sure that glitter only goes on the image, you will want to run your finger along the edges of your shape to make sure that there are not any rough edges.

Here you can see that in the sharp turns on the crown there are a few adhesive leftovers.


After running my finger along the edge quickly, we are all set to add glitter!


Here is another helpful hint to stress-free glittering!  I use Ziploc storage containers for my glitter and embossing powders!  That way the extra glitter falls right back into the container and I don't have to worry about trying to roll a piece of scrap paper enough to get the glitter back into the small container it comes in and it's a lot cleaner that way too.


I held onto the shape along the edges so I didn't get any adhesive stuck to my fingers rather than on the piece.  Then I spooned my glitter over the shape.

I then tapped off the excess right into the Ziploc container.  No worries about clean up!


Because the Creative Station add a protective plastic layer over the items I am adding adhesive to, I was able to run the glittered pieces through it to add adhesive to the back side.  This allowed me to have a strong adhesive on the back of each letter and shape I was adding to the banner without having all the glitter get ruined or clog up the machine with glitter.


And, you can see that the glitter still looks great even after putting the letters and shapes through the machine again!


Once the letters were all full of pink, sparkly glitter and had adhesive on the back, I stuck them to the pennant shapes that I had already layered together.  I then strung the banner and it is ready to go for Julia's 2nd birthday!


Tuesday, April 10, 2012

Some exciting news to share!

I am proud to announce that I am a new gel-a-tina for gel-a-tin stamps!  When I first started out scrapping it was cardstock and stamps for this girl.  Now I am getting back to my roots with stamps and ink, but I have come a long way since my first scrapbook pages and cards.  I am excited to share all of the fun I will be having with stamps!

Need some stampy inspiration?  Take some time to check out the gel-a-tins blog or "like" them on Facebook to stay up to date with all things gel-a-tin!

Monday, March 5, 2012

3.5 Mojo Monday - Everyday Items

This week's Mojo Monday list prompt is EVERYDAY ITEMS...

Being that I am a SAHM 85% of the time, I tend to use a lot of things that have to do with taking care of Julia, keeping my house from being condemned, and making sure no one in my house starves to death! But, I am also a student and scrapbooker the other 15% of my life, so I also have a few fun things I use everyday! Here is my list of Top 10 Everyday Items...

1. Baby Wipes - these really are multi-purpose items! I could probably come up with at least 50 things to use baby wipes for no problem!

2. Dishwasher - I will keep the dishes done, but I MUST have a dishwasher. And I am one of "those people" that put everything in the dishwasher, even pans!

3. Cable Box - I think life became perfect with the invention of a DVR! I admit, I watch a lot of trashy tv and my DVR helps make sure I never miss a show! ;)

4. iPhone 4 - I have had my iPhone for a little over a year and I really can't imagine getting rid of it. I don't *need* it, and it's an extra expense each month, but I really do love it and couldn't imagine using anything else not that I have had a taste of life with an iPhone.

5. Netbook - I love that it's little and I can easily use it while I'm in bed at night catching up on my shows.

6. Diet Coke - I am not a coffee drinker, but I *need* my caffine!

7. Slippers - I hate cold feet, but I also hate socks! The best solution, SLIPPERS!

8. Textbooks - They are a necessary evil.

9. Stove - I really do try to cook dinner every night. It is important to me that Julia learns good eating habits.

10. Comforter - No matter what time of year it is, I MUST have my comforter in order to sleep. Even when it's hot, I just wrap it up under my chin and kick my feet out to stay cool.

Wednesday, February 29, 2012

Monthly Roundup - February


What reading/learning did I do this month? 


I started my BSW program this month!  My first class was wonderful.  I am the youngest person in my class.  That is a HUGE change from my associates degree classes.


What entertainment did I watch/listen to this month? (movies, tv shows, plays, music, concerts, etc.)


I started watching the new series, Smash.  I really liked the first episode, the second one was ok, and now I can't decide if I will continue to watch it or not.


I don't remember who, but someone posted this Elmo video on Facebook and Julia has been hooked ever since!  We watch it a couple times a week at least.

What fun things did I do with my family and/or friends?


Julia and I spent a week with Casey and her family in Flint.  When Lou started the living room project, I decided it would be best to just get Julia out of dodge!


We celebrated Logan's 2nd birthday with a dinosaur party!


We celebrated Oliver's 2nd birthday at the Children's Museum with a Sesame Street theme!


Keira has started using the "Big Girl Potty" so we celebrated with her at Chuck E. Cheese.

What special or unusual purchases did I make?

We bought new carpet for the living room as well as drywall and paint!  I am so excited for it to be completed Friday.

What illnesses or health concerns did I have?


I managed to deep fry my fingers while making crab cakes.  I think the burn was the worst pain I can remember having in my life.  And don't forget, I have given birth!  On top of that I had to get a tetanus shot.  That is something I'm glad I won't have to do again for at least 10 years!!!


What were my disappointments this month?


I tried to potty train Julia.  We started trying the 7-days no diapers method.  By day 3, she was not having it.  I didn't want to traumatize her by forcing her to do it, so we will let it go for now and try again in a few months.

How did I do on my goals for the month? (Or any current short or long term goals)


I got a little behind with Project Life.  I ended up taking a couple weeks off from my Sunday scrap days due to the living room project.  I have printed pictures and put them into the pages, but I have to go back and add my journaling.

Anything else noteworthy to include?


HUGE project in our house this month.  We did the overhaul of the living/dining room.  The ceiling was drywalled, new crown moulding was installed, the walls and trim was painted, old carpet was removed, and new carpet will be here Friday!!!

Thursday, February 16, 2012

Freezer Cooking Day

Well, on a good note, my living room ceiling no longer looks like this...


But, unfortunately, it still looks like this...


Which means that Julia and I aren't able to hangout in the living room yet. This means that we are spending a lot of time in the kitchen, her bedroom, and my bedroom! Why not make use of that time in the living room and make a few meals for the freezer as well as making a few freezer meals to share with a few mom's in my Mom's Group that are expecting new babies soon.


Here is the plan for the day:


Lazy Lasagna Chili (made 4 - 3C bags)
1C chopped zucchini
1/2C chopped onion
1-1/2lbs Italian sausage
3 garlic cloves, pressed
26oz jar spaghetti sauce
30oz beef broth
1C water
1-1/2C uncooked pasta (egg noodles, radiatore, ziti work well)
basil

Chop zucchini & set aside (I cut it in slices and then cut the slices in half but I like bigger chunks). Cook sausage until no longer pink, add onions & garlic. Add spaghetti sauce, broth & water - bring to a boil. Stir in zucchini, cook 2-4 minutes until tender, add basil.

**Don't add the noodles before bagging. When reheating, add the noodles, another cup or two of water and cook them in at that point.**


BBQ Chicken (Crock Pot) (2 bagged meals)
Everything for this recipe goes into the bag raw.
Chop the following ingredients & divide them between the 2 bags...
3 sweet potatoes, cubed
1 zucchini, chopped
1 onion, sliced
2 green bell peppers, sliced
1 red bell peper, sliced
4-5 chicken breasts, diced

In each bag, place...
8oz tomato paste
1T Worcestershire
2T brown sugar
1T mustard powder
1 garlic clove
1/4tsp salt

Close up the bags, mix a bit and voila!
Reheating - This can go in the crock pot while still frozen. Add about 3/4C water or chicken broth. Cook on low for about 8 hours.


Baked Ziti (2 meals)
8 oz. container Ricotta cheese
4 cups Mozzarella cheese (divided)
1 cup Parmesan cheese
1 jar spaghetti sauce
16 oz box penne pasta


Cook pasta according to package for al dente pasta. While the pasta is cooking, in stock pot combine spaghetti sauce, ricotta cheese, Parmesan cheese, and 2 cups of Mozzarella cheese. Drain pasta and add to sauce mixture. Divide pasta and sauce mixture into two baking dishes or foil pans. Top each with 1 cup of Mozzarella cheese.
**Reheating- Take dish out of freezer and thaw in refrigerator. Bake covered at 350 degrees for 30 minutes or until cheese is melted. Remove cover and bake for additional 10 minutes to brown cheese on top.


All of this cooking will make 8 meals. I will be giving 3 away, eating one, and and have 4 to freeze for later! Not bad!!!

Tuesday, February 14, 2012

Snag A Camera Giveaway: Win a Canon 5D MKII or Nikon D700 from mcp actions!

Follow think link: http://bit.ly/xYrnpt  to Enter the MCP Actions 2012 “Snag a Canon or Nikon Camera Giveaway,” sponsored by PunchTab, the world’s first instant online loyalty and rewards platform!


Good luck to all that enter!

Benefit for Oakley Savickas

OAKLEY’S STORY


Dear Friend,
            I want to tell you about a wonderful one-year-old boy named Oakley. 
“The baby’s kidneys are measuring too big.”  Life was changed when Oakley’s parents went in for a routine prenatal ultrasound.  They had to transfer care to the High Risk clinic.  This consisted of weekly ultrasounds to try to see what exactly was wrong with the baby.  One thing they knew for sure is that Oakley had a blockage somewhere in his urinary system, which caused several complications.  A few of these were an enlarged abdomen, extremely enlarged kidneys, bladder, ureters, and he has also been given the diagnosis of Posterior Urethral Valves or PUV.
“We have to discuss some options.”  There was talk that due to his enlarged stomach, his lungs may be too compressed to breathe when he was born.  However, on 9/23/10, Oakley was born 3 weeks early and crying!  Oakley’s parents chose life for their son even though it was suggested he may not make it to birth.  They gave him a chance when nobody else would.  Never give up, never give in! Oakley was transferred to the NICU immediately after birth and a urinary catheter, feeding tube, and monitors were placed.  Around the clock blood work was done.  On Oakley’s 3rd day of life, he underwent his first surgery.  When they went in to perform the surgery, they realized they had misdiagnosed his condition.  The original diagnosis of PUV was ruled out.
“He looks great on the outside, but is very sick on the inside.” Oakley has several diagnoses.  He has a variant of Prune Belly Syndrome which is found in 1 in 40,000 births. Along with PBS, there are a multitude of other urinary and renal issues.  For treatment, multiple blood draws and specialty visits to the Urologist and Nephrologist are required. You see, when dealing with a ‘kidney kid’, unfortunately the future is very uncertain.  Oakley has been under anesthesia 3 times and under sedation 1 time in his first 15 months.  He has had 3 surgeries, 2 MRI’s and uncountable renal and bladder ultrasounds.  He has had to have invasive nuclear scans. (VCUG & MAG 3).  There is also a special diet, prescription formula, and daily medications that are takenThere is one thing they are sure of - Oakley will need an inevitable kidney transplant in his life.


            Oakley is not the only person that is living the lifestyle with a multitude of medical issues.  His mom, dad, two sisters & two brothers have shared in all of Oakley’s experiences; yet, this young family endures with determination and courage.  It is extremely difficult and emotionally draining for every member of the family. Hope prevails!
This family needs our help.  They have been given a gift of life that requires prayers, diligence, and persistence.  However, let alone in today’s economic hard times this family endures a financial burden that few of us will ever experience
 “For every negative in life, there is a positive.”  Oakley’s mother believes that God has chosen them to be parents to this special boy for a reason.  She has made it her will to raise awareness of Organ Donation.  Not only for Oakley, but for the other people who are awaiting a lifesaving organ transplant.


            If you could find it in your means to contribute ANYTHING to a benefit auction that will be held at Sts. Peter and Paul School gym on March 24, 2012, we would greatly appreciate it.  We are in need of large-scale items for a raffle as well as auction items.  Monetary donations may be made out to Sarah Savickas and mailed to: J’s Journey Attn: Sarah Savickas – 5796 Rollaway Dr. Comstock Park, MI 49321
Sincerely,
Kim Poplaski (KimL141@aol.com) we are also able to pick donated items up.  Please call or email.
Mary Ann and Nick Friar – J’s Journey – Families Helping Families Fundraising Events 616-785-3240

Monday, February 13, 2012

Mark your calendars...

With all the daily demands on our time, it's often difficult to take time away to scrap. Well, this year there is an extra day on the calendar. There's no better way to use it than to scrap!!!

We would like to invite you to join us for the Leap Into Scrapping Crop.


The fun will begin on Friday Feb. 24 and go until Sunday Feb. 26. There will be great challenges, games, and FUN FUN FUN!!!

If you haven't already, join www.scrapfreak.com so you are ready for all the great inspiration!